/*
* Android开发之数据保存技术(一)
* 北京Android俱乐部群:167839253
* Created on: 2011-8-17
* Author: blueeagle
* Email: liujiaxiang@gmail.com
*/
Android通过SQLite库提供了完善的关系数据库功能,而没有强加任何额外的限制。通过使用SQLite,可以为每一个应用程序创建独立的关系数据库。
所有的Android数据库都存储在/data/data/<package_name>/databases文件夹下。默认条件下,所有的数据库都是私有的,并且只能被创建它们的应用程序访问。要跨应用程序共享数据库,可以使用内容提供器。
SQLite是一个关系数据管理系统。它被普遍认为是:开源,兼容标准,轻量级,Single-tier。
可以用一个例子来演示SQLite。该例子将记录存储在一个数据库中,然后显示出来。
新建一个HelloSQLite的程序。
需要在某个地方放置该数据库中描述的一些常量,所以要创建一个Constants接口。
代码如下:
- package com.blueeagle;
-
-
-
- import android.provider.BaseColumns;
-
- public interface Constants extends BaseColumns {
-
- /** Called when the activity is first created. */
-
- public static final String TABLE_NAME = "HelloSQLite";
-
- public static final String TIME = "time";
-
- public static final String TITLE = "title";
-
- }
每个事件都将作为HeloSQLite表中的一行进行存储。每行都包含一个_id、time和title列。_id是主键,在扩展的BaseColums接口中声明。time和title分别作为时间和事件标记。
使用SQliteOpenHelper。接下来,创建一个名为SQLiteData的帮助器来表示数据库本身。这个类扩展自Android的SQLiteOpenHelper类,它负责管理数据库的创建和版本。需要做的就是提供一个构造方法并且覆写两个方法。
代码如下:
-
- package com.blueeagle;
-
-
-
- import android.content.Context;
-
- import android.database.sqlite.SQLiteDatabase;
-
- import android.database.sqlite.SQLiteDatabase.CursorFactory;
-
- import android.database.sqlite.SQLiteOpenHelper;
-
- import static com.blueeagle.Constants.TABLE_NAME;
-
- import static com.blueeagle.Constants.TIME;
-
- import static com.blueeagle.Constants.TITLE;
-
- import static android.provider.BaseColumns._ID;
-
-
-
- public class MySQLite extends SQLiteOpenHelper {
-
-
-
- private static final String DATABASE_NAME = "MySQLite.db";
-
- private static final int DATABASE_VERSION = 1;
-
-
-
- public MySQLite(Context context, String name, CursorFactory factory,
-
- int version) {
-
- super(context, DATABASE_NAME, factory, DATABASE_VERSION);
-
- // TODO Auto-generated constructor stub
-
- }
-
-
-
- @Override
-
- public void onCreate(SQLiteDatabase db) {
-
- // TODO Auto-generated method stub
-
- db.execSQL("CREATE TABLE "+ TABLE_NAME+"("+_ID+"INTEGER PRIMARY KEY AUTOINCREMENT,"+TIME+"INTEGER,"+TITLE+"TEXT NOT NULL);");
-
- }
-
-
-
- @Override
-
- public void onUpgrade(SQLiteDatabase db, int oldVersion, int newVersion) {
-
- // TODO Auto-generated method stub
-
- db.execSQL("DROP TABLE IF EXISTS" + TABLE_NAME);
-
- onCreate(db);
-
-
-
- }
-
- }
首次访问数据库时,SQLiteOpenHelper将注意到该数据库不存在,并调用onCreate()方法来创建它。
定义Activity主程序。
在HelloSQLite程序中做的第一次尝试是使用本地的SQLite数据库来存储事件,并将这些事件显示为TextView中的一个字符串。
布局xml文件如下:
- main.xml
-
- <?xml version="1.0" encoding="utf-8"?>
-
- <ScrollView xmlns:android="http://schemas.android.com/apk/res/android"
-
- android:layout_width="fill_parent"
-
- android:layout_height="fill_parent"
-
- >
-
- <TextView
-
- android:id="@+id/myText"
-
- android:layout_width="fill_parent"
-
- android:layout_height="wrap_content"
-
- />
-
- </ScrollView>
这段代码使用一个ScrollView,以防太多的时间沾满了屏幕。
对于HelloSQLite.java的实现如下所示:相关代码有注释说明。
- package com.blueeagle;
-
-
- import android.app.Activity;
-
- import android.content.ContentValues;
-
- import android.database.Cursor;
-
- import android.database.sqlite.SQLiteDatabase;
-
- import android.os.Bundle;
-
- import android.widget.TextView;
-
- import static com.blueeagle.Constants.TABLE_NAME;
-
- import static com.blueeagle.Constants.TIME;
-
- import static com.blueeagle.Constants.TITLE;
-
- import static android.provider.BaseColumns._ID;
-
-
-
- public class HelloSQLite extends Activity {
-
- /** Called when the activity is first created. */
-
- private MySQLite mySqlite;
-
- private static String[] FROM={_ID,TIME,TITLE};
-
- private static String ORDER_BY = TIME+" DESC";
-
- @Override
-
- public void onCreate(Bundle savedInstanceState) {
-
- super.onCreate(savedInstanceState);
-
- setContentView(R.layout.main);
-
-
-
- mySqlite = new MySQLite(this);
-
- try{
-
- addItem("Hello,Android!");
-
- Cursor cursor = getItems();
-
- showItems(cursor);
-
- }
-
- finally{
-
- mySqlite.close();
-
- }
-
- }
-
- //显示查询结果
-
- private void showItems(Cursor cursor) {
-
- // TODO Auto-generated method stub
-
- StringBuilder builder = new StringBuilder("Saved items:\n");
-
- while(cursor.moveToNext()){
-
- long id = cursor.getLong(0);
-
- long time = cursor.getLong(1);
-
- String title = cursor.getColumnName(2);
-
- builder.append(id).append(": ");
-
- builder.append(time).append(": ");
-
- builder.append(title).append("\n");
-
- }
-
- TextView myTextView = (TextView)findViewById(R.id.myText);
-
- myTextView.setText(builder);
-
- }
-
- //此函数接受一个Cursor作为输入并格式化,以便用户能够理解输出的内容
-
- //查询条目方法
-
- private Cursor getItems() {
-
- // TODO Auto-generated method stub
-
- SQLiteDatabase db = mySqlite.getReadableDatabase();
-
- Cursor cursor = db.query(TABLE_NAME, FROM, null, null, null, null, ORDER_BY);
-
- startManagingCursor(cursor);
-
- return cursor;
-
- }
-
- //因为查询不用修改数据库,因此利用只读句柄,然后调用查询的query方法来执行SQL语句,FROM是
-
- //想要使用的列构成的数组,ORDER_BY告诉SQLite按照从新到旧的顺序返回查询结果。
-
- //添加条目方法
-
- private void addItem(String string) {
-
- // TODO Auto-generated method stub
-
- SQLiteDatabase db = mySqlite.getWritableDatabase();
-
- ContentValues values = new ContentValues();
-
- values.put(TIME, System.currentTimeMillis());
-
- values.put(TITLE, string);
-
- db.insert(TABLE_NAME, null, values);
-
- }
-
- //因为要修改数据库,所以调用getWritableDatabase()方法来获取数据库的一个写句柄,当然也可以获取
-
- //到读句柄。
-
- }
完成上述文件-》运行,即可看到结果显示出来。这样就完成了第一个Android数据库程序。
当然,这里面需要注意的问题:
1. 新建数据库的问题
新建数据库的时候,会遇到我们用:
db.execSQL("CREATE TABLE "+ TABLE_NAME+"("+_ID+"INTEGER PRIMARY KEY AUTOINCREMENT,"+TIME+"INTEGER,"+TITLE+"TEXT NOT NULL);");
这样一条语句。有时候SQL语句书写错误,比如少一个空格就会引起程序异常退出。这个时候建议在db.execSQL()函数中填写一个字符串变量,然后把自己写的SQL语句赋给字符串变量,在做赋值操作的时候,先打印出来看看,是不是少空格,多+号什么的小错误。
2. 版本号的问题
关于构造函数中的版本号,是有明确的说明的。
public MySQLite(Context context, String name, CursorFactory factory,
int version) {
super(context, DATABASE_NAME, factory, DATABASE_VERSION);
这个版本号version当你有新版本的时候,则做更新操作,新版本的版本号将要比老版本高,如果此时修改版本号,不是向高修改,而是向低修改的话,程序就会发生异常了。
3. 数据库文件的问题
对于onCreate()方法,在程序运行的时候,只运行一次,运行的这一次就是去创建数据库。将数据库的文件存储在SD卡中。路径是data/data/包名/databases里。可以在Eclipse里通过DDMS里的File Explorer来查看。当数据库文件存在了以后,则不会再次运行。
完成了上述例子,就算完成了一个数据库的应用。但是如果列表中有数千个或者上百万个事件。程序将运行的非常慢。甚至于耗尽内存。解决办法就是数据绑定。
有了数据绑定,只需要几行代码,就可以将数据连接到视图,从而实现需求。为了演示,我们修改上面的实例。
将主程序HelloSQLite.java继承ListActivity而不是Activity。
将代码修改为如下所示:
- package com.blueeagle;
-
- import android.app.ListActivity;
-
- import android.content.ContentValues;
-
- import android.database.Cursor;
-
- import android.database.sqlite.SQLiteDatabase;
-
- import android.os.Bundle;
-
- import android.widget.SimpleCursorAdapter;
-
- import static com.blueeagle.Constants.TABLE_NAME;
-
- import static com.blueeagle.Constants.TIME;
-
- import static com.blueeagle.Constants.TITLE;
-
- import static android.provider.BaseColumns._ID;
-
-
-
- public class HelloSQLite extends ListActivity {
-
- /** Called when the activity is first created. */
-
- private MySQLite mySqlite;
-
- private static String[] FROM={_ID,TIME,TITLE};
-
- private static String ORDER_BY = TIME+" DESC";
-
- //@Override
-
- public void onCreate(Bundle savedInstanceState) {
-
- super.onCreate(savedInstanceState);
-
- setContentView(R.layout.main);
-
-
-
- mySqlite = new MySQLite(this);
-
- try{
-
- addItem("Hello,Android!");
-
- Cursor cursor = getItems();
-
- showItems(cursor);
-
- }
-
- finally{
-
- mySqlite.close();
-
- }
-
- }
-
- private static int[] TO = {R.id.rowid,R.id.time,R.id.title};
-
- private void showItems(Cursor cursor) {
-
- SimpleCursorAdapter adapter = new SimpleCursorAdapter(this,R.layout.item,cursor,FROM,TO);
-
- //这里有必要说明一下SimpleCursorAdapter构造函数的5个参数。1.对应于当前Activity的引用,2.一个资源,它定义一个列表条目的视图,
-
- //3.数据集光标,4.一组列名称,数据来源于这些列。5.视图列表,这是数据的目的地。
-
- setListAdapter(adapter);
-
-
-
- }
-
- private Cursor getItems() {
-
- SQLiteDatabase db = mySqlite.getReadableDatabase();
-
- Cursor cursor = db.query(TABLE_NAME, FROM, null, null, null, null, ORDER_BY);
-
- startManagingCursor(cursor);
-
- return cursor;
-
- }
-
- private void addItem(String string) {
-
- // TODO Auto-generated method stub
-
- SQLiteDatabase db = mySqlite.getWritableDatabase();
-
- ContentValues values = new ContentValues();
-
- values.put(TIME, System.currentTimeMillis());
-
- values.put(TITLE, string);
-
- db.insert(TABLE_NAME, null, values);
-
- }
-
- }
将main.xml修改成如下形式:
- <?xml version="1.0" encoding="utf-8"?>
-
- <LinearLayout xmlns:android="http://schemas.android.com/apk/res/android"
-
- android:layout_width="fill_parent"
-
- android:layout_height="fill_parent"
-
- >
-
- <ListView
-
- android:id="@android:id/list"
-
- android:layout_height="wrap_content"
-
- android:layout_width="wrap_content">
-
- </ListView>
-
- <TextView
-
- android:id="@android:id/empty"
-
- android:layout_height="wrap_content"
-
- android:layout_width="wrap_content"
-
- android:text="empty!">
-
- </TextView>
-
- </LinearLayout>
增加item.xml为如下:
- <?xml version="1.0" encoding="utf-8"?>
-
- <RelativeLayout xmlns:android="http://schemas.android.com/apk/res/android"
-
- android:orientation="horizontal"
-
- android:layout_width="fill_parent"
-
- android:layout_height="fill_parent"
-
- android:padding="10sp"
-
- >
-
- <TextView
-
- android:id="@+id/rowid"
-
- android:layout_height="wrap_content"
-
- android:layout_width="wrap_content">
-
- </TextView>
-
- <TextView
-
- android:id="@+id/rowidcolon"
-
- android:layout_height="wrap_content"
-
- android:layout_width="wrap_content"
-
- android:text=":"
-
- android:layout_toRightOf="@id/rowid">
-
- </TextView>
-
- <TextView
-
- android:id="@+id/time"
-
- android:layout_height="wrap_content"
-
- android:layout_width="wrap_content"
-
- android:layout_toRightOf="@id/rowidcolon">
-
- </TextView>
-
- <TextView
-
- android:id="@+id/timecolon"
-
- android:layout_height="wrap_content"
-
- android:layout_width="wrap_content"
-
- android:text=":"
-
- android:layout_toRightOf="@id/time">
-
- </TextView>
-
- <TextView
-
- android:id="@+id/title"
-
- android:layout_height="fill_parent"
-
- android:layout_width="wrap_content"
-
- android:textStyle="italic"
-
- android:ellipsize="end"
-
- android:singleLine="true"
-
- android:layout_toRightOf="@id/timecolon">
-
- </TextView>
-
- </RelativeLayout>
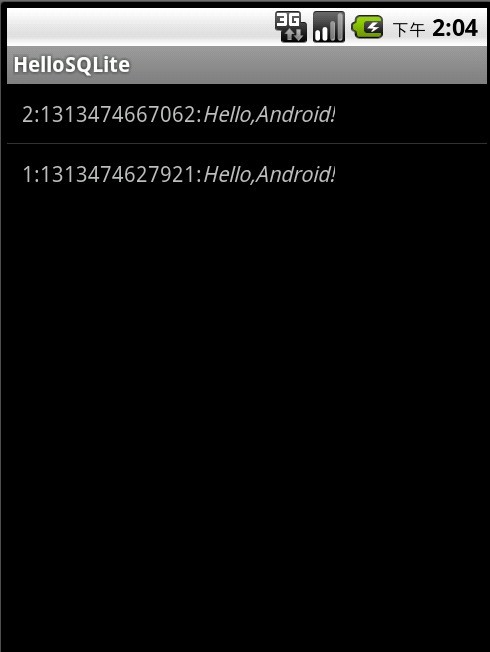
运行结果如图所示。
当然,这只是一个DEMO,用来展示如何使用SQLite,这个DEMO存在一些问题。其他应用程序都不能向事件数据库添加内容,甚至于无法看这些事件。那么针对这一点,引出了Android里的内容提供器,即ContentProvider。
posted on 2013-02-20 10:38
游子 阅读(3012)
评论(0) 编辑 收藏 引用 所属分类:
软件